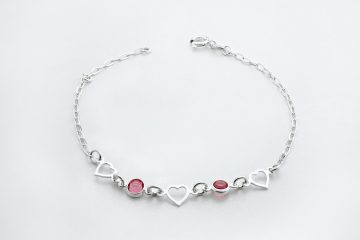
Do you often struggle with putting on a bracelet by yourself? You’re not alone! Many people face this common dilemma. But fear not, because we have the ultimate step-by-step guide to help you master the art of putting on a bracelet solo. Whether it’s a delicate gold chain or a chunky statement piece, we’ve got you covered. So, let’s dive in and learn how to effortlessly put on a bracelet without any assistance.
1. Gather Your Tools and Bracelet
Before we begin, ensure you have the necessary tools and your chosen bracelet. You’ll need a well-lit area, a mirror (optional but helpful), and a flat surface to work on. Additionally, make sure your bracelet is clean and free from any tangles or knots.
2. Familiarize Yourself with the Clasp
Take a moment to understand the clasp mechanism of your bracelet. Bracelets usually have lobster clasps, spring rings, or toggle clasps. Each type has its own unique way of fastening and unfastening.
3. Open the Clasp
Now that you’re familiar with the clasp, gently open it. Depending on the type of clasp, you may need to press a small lever or slide a piece to release it. Be cautious not to force the clasp open, as it might damage the bracelet.
4. Position the Bracelet
Hold the bracelet by the clasp and drape it over your wrist. Ensure it is positioned correctly and won’t slip off while you work on securing the clasp.
5. Use Your Dominant Hand
Using your dominant hand (the hand you write with), hold the bracelet firmly against your wrist. This will prevent it from moving around while you fasten the clasp.
6. Bring the Clasp Closer
With your dominant hand, bring the clasp closer to the other end of the bracelet. Maintain a gentle grip on the bracelet to prevent it from slipping off your wrist.
7. Secure the Clasp
Now comes the tricky part: securing the clasp. Depending on the type of clasp, follow the appropriate technique:
a. Lobster Clasp
If your bracelet has a lobster clasp, hold the open end with your non-dominant hand and use your dominant hand to guide the other end of the bracelet into the clasp. Once it’s inside, release the clasp, and it will close securely.
b. Spring Ring Clasp
For a spring ring clasp, hold the open end with your non-dominant hand, and using your dominant hand, press down on the small lever to open the clasp. Slide the other end of the bracelet onto the clasp and release the lever to secure it.
c. Toggle Clasp
Toggle clasps require a slightly different technique. Hold the bar of the toggle clasp with your non-dominant hand and use your dominant hand to guide the ring through the opening. Once the ring is through, release the bar, and it will hold the bracelet in place.
8. Check the Fit
Once the clasp is secured, check the fit of your bracelet. It should be snug enough to stay on your wrist but not too tight that it feels uncomfortable. Adjust the clasp if necessary to achieve the perfect fit.
9. Practice Makes Perfect
Putting on a bracelet by yourself may take some practice, especially if you’re new to it. Don’t get discouraged if it doesn’t go smoothly the first few times. With time and practice, you’ll become more proficient at this task.
10. Tips and Tricks
Here are some additional tips and tricks to make the process even easier:
a. Use a Bracelet Buddy
Consider investing in a bracelet buddy, a handy tool designed to hold one end of the bracelet while you secure the clasp. It eliminates the need for a second pair of hands and makes the process more manageable.
b. Opt for Magnetic Clasps
If you struggle with traditional clasps, look for bracelets with magnetic clasps. These clasps easily snap together, allowing you to put on and remove your bracelet effortlessly.
c. Try Stretch Bracelets
Stretch bracelets are a great option if you find clasps challenging. These bracelets simply stretch over your hand and sit comfortably on your wrist without the need for a clasp.
Conclusion
Putting on a bracelet by yourself doesn’t have to be a daunting task. By following these step-by-step instructions and practicing regularly, you’ll become a pro in no time. Remember to gather your tools, familiarize yourself with the clasp, and position the bracelet correctly. Then, using your dominant hand, secure the clasp according to its type. Check the fit and make any necessary adjustments. Don’t forget to utilize helpful tools like the bracelet buddy, consider magnetic clasps, or opt for stretch bracelets. With a little patience and perseverance, you’ll master the art of putting on a bracelet solo.
FAQs
1. What if my bracelet is too tight to fasten?
If your bracelet feels too tight to fasten comfortably, you may need to loosen the clasp. Some bracelets have adjustable lengths or extension chains that can provide extra room.
2. How can I avoid tangling my bracelet while putting it on?
To prevent tangling, lay your bracelet flat on a surface before putting it on. This will help you avoid any unnecessary twists or knots.
3. Can I put on a bracelet one-handed without any tools?
While it may be challenging, it’s possible to put on a bracelet one-handed without tools. With practice and patience, you can develop the dexterity required for this task.
4. Are there any tricks for putting on a bracelet with small clasps?
If you find it difficult to handle small clasps, try using tweezers or a small tool with a grip to hold the clasp while you secure it.
5. What should I do if my bracelet keeps falling off?
If your bracelet consistently falls off your wrist, it may be too loose. Consider having it resized or adding additional links to ensure a better fit.


