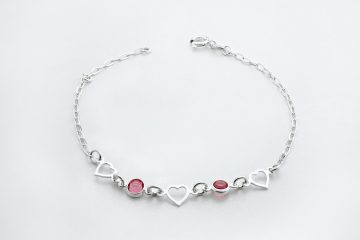
Friendship bracelets are not just a fashion accessory; they are also a symbol of the everlasting bond between friends. Making friendship bracelets is an enjoyable and creative hobby that allows you to express your individuality while creating a heartfelt gift for someone special. If you’re new to the world of friendship bracelets and don’t know where to begin, this beginner’s guide will walk you through the process step-by-step. From selecting materials to mastering different knotting techniques, you’ll soon be on your way to creating beautiful bracelets that will be treasured for years to come.
1. Understanding the Basics
Before diving into bracelet-making, it’s important to familiarize yourself with the basics. Friendship bracelets are typically made using embroidery floss, which is a versatile and affordable material available in a wide range of colors. You can find embroidery floss at craft stores or online. It’s also helpful to have a pair of scissors, a ruler, and a clipboard or tape to hold your bracelet in place while you work. Once you have your materials ready, you can start exploring the various knotting techniques.
2. Choosing the Right Pattern
When it comes to friendship bracelets, the possibilities are endless. There are numerous patterns and designs to choose from, ranging from simple to intricate. As a beginner, it’s best to start with a basic pattern that uses just a few knots. A popular choice is the “chevron” or “V” pattern, which creates a zigzag design. Once you feel more comfortable, you can experiment with more complex patterns like the “diamond” or “arrowhead” designs. There are plenty of resources available online, such as tutorial videos and pattern charts, to help you find the perfect design for your bracelet.
3. Preparing the Embroidery Floss
Before you begin knotting, you’ll need to prepare your embroidery floss. Most friendship bracelets are made with multiple strands of floss, typically ranging from 4 to 8 strands. Decide how many strands you want to use based on the thickness and durability you desire for your bracelet. To prevent tangling, cut the strands slightly longer than the desired length of your bracelet. You can always trim them later. Once you have your strands ready, tie a knot at one end to hold them together. This will be the starting point of your bracelet.
4. Getting Started with Knotting
The most basic knot used in friendship bracelets is the forward knot. To make a forward knot, take the strand on the left and cross it over the middle strands, forming a “4” shape. Then, take the strand on the right and pass it over the left strand and under the middle strands, coming out through the loop of the “4” shape. Pull both strands to tighten the knot. Repeat this process, alternating between the left and right strands, until you reach the desired length for your bracelet.
5. Adding Beads and Charms
If you want to add some extra flair to your friendship bracelet, you can incorporate beads or charms into your design. To do this, simply thread the beads onto one or more of the strands before you start knotting. You can add them at regular intervals or create a pattern with the beads. Charms can be attached using jump rings or by tying them onto a specific strand. Beads and charms add a personal touch to your bracelet and make it even more special for the recipient.
6. Experimenting with Color
One of the most exciting aspects of making friendship bracelets is choosing the colors. Embroidery floss comes in an array of vibrant shades, allowing you to create unique and personalized designs. You can stick to a single color for a simple and elegant bracelet, or combine multiple colors to create fun and eye-catching patterns. Don’t be afraid to experiment and let your creativity shine through. Remember, the colors you choose can convey different meanings, so consider the recipient’s preferences and the message you want to convey with your bracelet.
7. Finishing Touches
Once you’ve reached the desired length for your bracelet, it’s time to finish it off. You can do this by making a simple knot at the end or by using a closure such as a button or a clasp. To make a button closure, leave a gap between the last few knots and the end of your bracelet. Then, thread both ends through a button and tie a knot to secure it. Alternatively, you can attach a lobster clasp or a hook and loop closure for easy wearing and removal.
8. Caring for Your Bracelet
Friendship bracelets are meant to be worn and cherished, so it’s important to take care of them. To keep your bracelet looking its best, avoid wearing it in water or exposing it to harsh chemicals. Over time, the colors may fade due to sun exposure, so it’s best to remove your bracelet before prolonged sun exposure. If your bracelet becomes dirty, you can gently hand wash it with mild soap and water, then lay it flat to dry. Proper care will ensure that your friendship bracelet remains a beautiful keepsake for years to come.
9. Frequently Asked Questions
Q1: Can I make friendship bracelets with different materials?
A1: While embroidery floss is the most popular choice for friendship bracelets, you can experiment with other materials like hemp cord, leather, or yarn to create unique designs.
Q2: How long does it take to make a friendship bracelet?
A2: The time it takes to make a friendship bracelet depends on the complexity of the pattern and your level of experience. Simple bracelets can be completed in a few hours, while more intricate designs may take several days.
Q3: Can I make personalized friendship bracelets with names or initials?
A3: Absolutely! You can incorporate names, initials, or even short messages into your bracelet design using different knotting techniques or adding letter beads.
Q4: Can I make friendship bracelets as a group activity?
A4: Definitely! Friendship bracelet-making can be a fun and engaging group activity. Gather your friends or family members and create bracelets together, exchanging them as a symbol of your bond.
Q5: Are there any online communities or forums for friendship bracelet enthusiasts?
A5: Yes, there are several online communities and forums where friendship bracelet enthusiasts share their creations, patterns, and tips. Joining these communities can provide inspiration and guidance for your own bracelet-making journey.
In conclusion, making friendship bracelets is a delightful way to express your creativity while strengthening the bonds of friendship. With a few basic supplies and a willingness to learn, you can create intricately woven bracelets that are both thoughtful gifts and personal fashion statements. Remember to select a pattern that suits your skill level, experiment with colors and materials, and add unique touches to make your bracelet truly one-of-a-kind. Enjoy the process and embrace the joy of crafting beautiful tokens of friendship.


