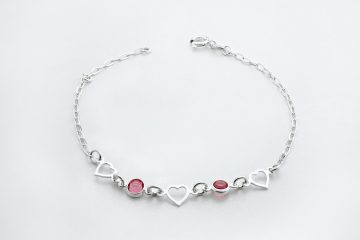
Bracelets are not only a fashionable accessory but also a way to express individuality and creativity. Crafting your own bracelets can be a fun and rewarding experience, allowing you to customize the design to match your personal style. In this step-by-step guide, we will explore various techniques and materials to help you create stunning bracelets that you can proudly wear or gift to others.
1. Choosing the Right Materials
Before diving into the bracelet-making process, it’s crucial to gather all the necessary materials. Here are the key components you’ll need:
Beads and Charms
Beads and charms are the heart and soul of any bracelet. They come in a wide range of colors, shapes, and materials such as glass, gemstones, acrylic, wood, or metal. Choose beads and charms that resonate with your style and desired aesthetic.
Stringing Material
The choice of stringing material depends on the type of bracelet you want to create. Options include elastic cord, nylon thread, leather cord, or wire. Each material has its own unique properties, so consider factors like durability, flexibility, and the weight of the beads.
Findings and Clasps
Findings and clasps are essential for securing your bracelet. These include jump rings, crimp beads, lobster clasps, or toggle clasps. Ensure they match the overall design and materials used.
2. Planning Your Design
Before starting any craft project, it’s important to have a clear vision of what you want to create. Take some time to plan the design of your bracelet. Consider factors like color combinations, bead patterns, and the overall length of the bracelet.
Choosing a Color Scheme
Decide on a color scheme that complements your style or matches an outfit. You can opt for monochromatic tones, vibrant contrasts, or harmonious blends. Experiment with different combinations to find what works best for you.
Designing Bead Patterns
Bead patterns can add depth and visual interest to your bracelet. Experiment with different arrangements, alternating bead sizes, or incorporating charms to create unique patterns. Sketch out your design or use a virtual design tool to visualize the final product.
3. Selecting the Right Technique
Bracelet-making techniques vary depending on the materials and style you choose. Here are a few popular techniques to consider:
Stringing
Stringing is the simplest technique, suitable for beginners. It involves threading beads onto a stringing material, such as elastic cord or nylon thread. You can create a basic string of beads or incorporate knots and spacers for added flair.
Bead Weaving
Bead weaving involves creating intricate patterns by weaving beads together using a needle and thread. This technique allows for more intricate designs and enables you to incorporate different bead shapes and sizes.
Wire Wrapping
Wire wrapping involves using wire to connect beads and create unique designs. This technique offers endless possibilities for creating intricate and decorative bracelets. It requires some basic wire bending and wrapping skills.
4. Getting Started with the Bracelet-Making Process
Once you have your materials, design, and technique selected, it’s time to start crafting your beautiful bracelet. Follow these step-by-step instructions to guide you through the process:
Step 1: Measure and Cut the Stringing Material
Measure the desired length of your bracelet, leaving some extra length for attaching the clasps. Use scissors or wire cutters to cut the stringing material to the appropriate length.
Step 2: Secure the Clasp
Attach one side of the clasp to the stringing material using jump rings or crimp beads. Ensure it is securely fastened to prevent the bracelet from coming undone.
Step 3: Stringing the Beads
Start threading the beads onto the stringing material according to your design. Take your time and ensure the beads are centered and evenly spaced.
Step 4: Adding Spacers or Charms
If desired, add spacers or charms between the beads to create a more intricate design. This step can add depth and visual interest to your bracelet.
Step 5: Finishing Touches
Once you have threaded all the beads and charms, secure the other side of the clasp using jump rings or crimp beads. Double-check that everything is tightly secured to prevent any accidental unraveling.
Conclusion
Crafting beautiful bracelets is an enjoyable way to express your creativity and style. By following this step-by-step guide, you can create unique and personalized bracelets that reflect your individuality. Remember to choose the right materials, plan your design, select the appropriate technique, and follow the detailed instructions. With practice and experimentation, you’ll soon be crafting stunning bracelets that will become cherished accessories.
FAQs
1. How do I choose the right size for my bracelet?
Choosing the right size for your bracelet depends on personal preference and comfort. Measure your wrist using a flexible measuring tape or a piece of string, then add a small amount of extra length to ensure a comfortable fit.
2. Can I mix different materials when making a bracelet?
Absolutely! Mixing different materials can create unique and visually appealing bracelets. Experiment with combining beads, charms, and stringing materials to achieve your desired look.
3. How can I fix a broken bracelet?
If your bracelet breaks, don’t worry! Depending on the type of damage, you can use jump rings, crimp beads, or wire to repair it. If you’re unsure, consult online tutorials or consider taking it to a professional jeweler.
4. Are there any safety precautions I should take while making bracelets?
While crafting bracelets, be mindful of sharp tools such as scissors or wire cutters. Use them carefully and keep them out of reach of children. Additionally, if using glue or adhesive, ensure proper ventilation and follow the manufacturer’s instructions.
5. Can I sell the bracelets I make?
Yes, you can sell the bracelets you make. However, be sure to research any legal requirements or regulations in your area regarding selling handmade jewelry.


